
On this page: awning, access compartments, fuel access door, vents, cleaning
Awning [Need to finish.]
• Roadtrek 190P Manual in .pdf MP37
• Carefree of Colorado Freedom WM Patio Awning Manual in .pdf
• Extending the Awning - Press and hold the switch in the OUT (extend) position until the awning is in the desired position then
release the switch.
• Retracting the awning - Detach and stow the vertical support legs if used... Press and hold the switch in the IN (retract)
position until the awning is in the desired position then release the switch.
VERTICAL SUPPORT LEGS
Two telescoping vertical support legs are stowed in the lead rail. These can be used to
provide increased stability and to adjust the height of the front edge (lead rail).
1. Extend the awning.
2. Unlock the latch on the leg then slide the foot back to clear the tabs on the lead rail endcap.
3. Lock the latch and slide the leg out the end of the lead rail until it stops. It
will be necessary to lift the foot up to slide out of the end of the lead rail.
4. Horizontally rotate the leg 90 degrees.
5. Swivel the leg down.
6. Press the release catch and extend the first section of the leg until it locks
in place with the ball lock.
7. For Carport Position:
• Open the latch and extend the middle section of the support down until
the carport foot is touching the ground.
• Hold the carport foot on the ground and lift the top section of the support
until the awning is at the desired height. Close the latch.
• Stake the carport foot to the ground. (Stakes are not included)
8. For Wall Support:
• Rotate and extend the leg to the bottom bracket.
• Lift the retaining pin and insert the foot into the bracket. Allow the
retaining pin to drop down over the foot.
• Lift the top section of the support until the awning is at the desired
height. Lock the latch.
9. Repeat for other side.
To stow the leg, reverse the above steps.
Articles
• Cheap grommet can save your day – and your awning
Access Compartments MP39
• Supplied with your new Roadtrek are two types of small keys. One is for the storage compartments, and the other is to
unlock the chrome surround on your spare tire. Find both keys, put one of each on your key ring, and carry them with you
whenever you drive your Roadtrek. If you ever need to change a tire, you will need this key. MP77
• In BACK of RV with rear doors open
• Propane Access Panel with main propane tank value MP40
• interior fresh water access
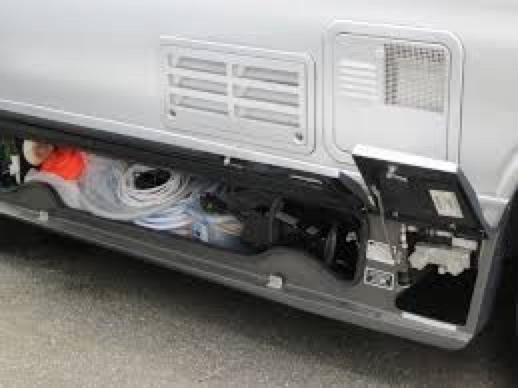
• On the PASSENGER side is the Battery Access Door.
• On the DRIVER side, there are 3 doors that house items that you will use for Site Set Up.
• The small access door directly behind the driver's door has the dump valves for the gray and black tanks.
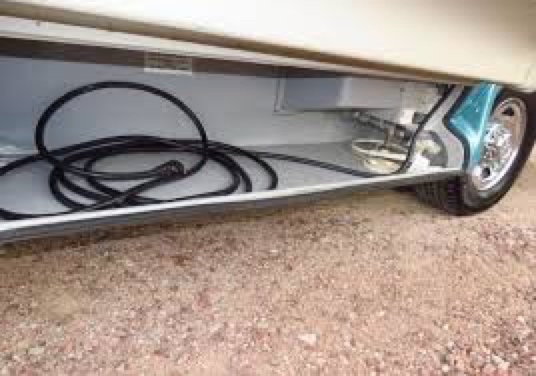
• The center door has a storage area for the waste water discharge hose and power cord.
•[Other center compartment inventory:
30A extension cord
15A to 30A adaptor,
(need 50A to 30A adaptor)
surge protector
bin for electric cords
cord carriers / handles
10ft and 15ft potable water hoses and quick connect
25' flat, potable water hose to use for cleaning
bin for hoses
heavy duty rubber gloves for dump work
work towels to clean
spray bottle Branch Basic concentrate
small bucket to hold dump tools
tarp/mat for kneeling
• The smaller door just in front of the rear tire has the outside shower. The rear access door has the shower and
cable TV connection, [and the city pressurized water connection.]
• In addition, IN the DRIVER DOOR is the access to the exterior fresh water tank and the macerator button for dumping waste
• At the far rear of the diriver side is the fuel access door.
Fuel Access door
Vents
Directly above the center access door and below the galley window you will see two vent hatches. The rectangular one is for
the refrigerator and the square one is for the water heater. The water heater will vent hot gasses when the water heater is
running. The small chrome plated vent near the driver's door is for the propane furnace intake and exhaust. Do not block any
of these vents, or dangerous fumes may enter the interior of the Roadtrek. MP39
Cleaning and Waxing
• If possible, try to keep your RV covered when not using it, to help protect it from Mother Nature. The cover model
Mike recommends is Hugger Covers. The best way to protect your RV is to clean it. Wash it after use and wax it once or twice
a year. ... he use Turtle Wax Ice. It costs about $7.50 for a 48 oz bottle and produces a thick foam which encapsulates and
loosens abrasive soils. The encapsulation technology helps prevent soils from re-depositing on the paint finish to reduce the
formation of swirl marks and minor surface scratches. The Best Way to Protect Your RV From Environmental Damage